(Prepare for a long blog post! Picture heavy too!)
Okay, so a long while back, I made a tutorial called "How to Lion" and posted it on Deviantart. It's got around 13 faves and over 300 views, so for my stuff, that's pretty popular xD
Anyway, I recently was wanting to redo it, for a more realistic style rather than the cartoony style it was done in. Well, today I finished off what I'm happy to call "How to Lion 2.0"! Without further ado, enjoy this tutorial ;)
*Note: Text/instruction will follow the image they are for!
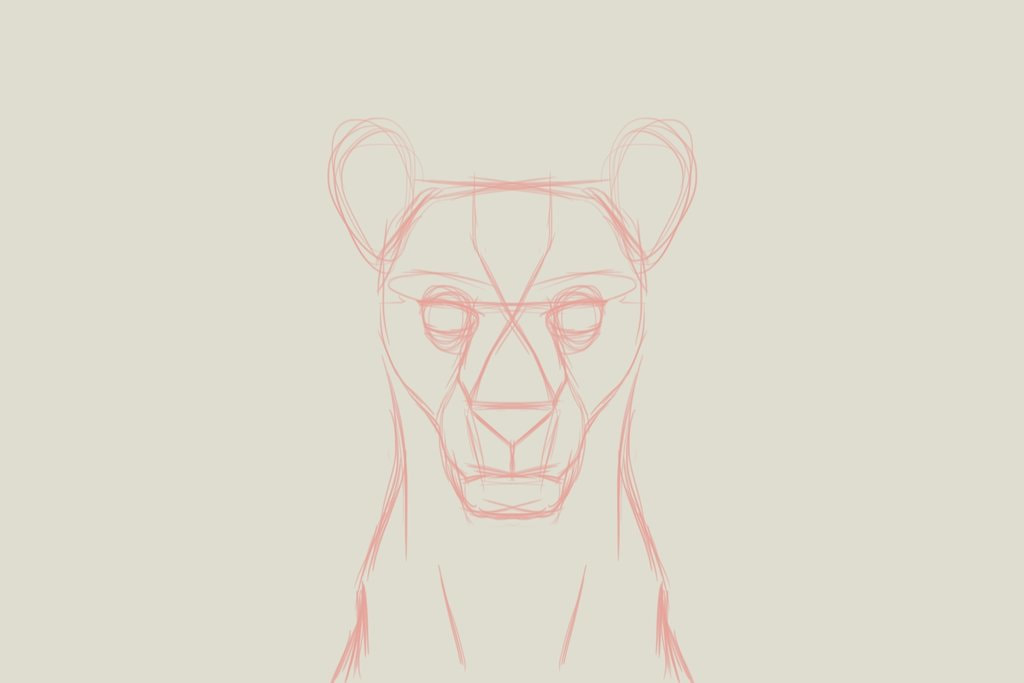
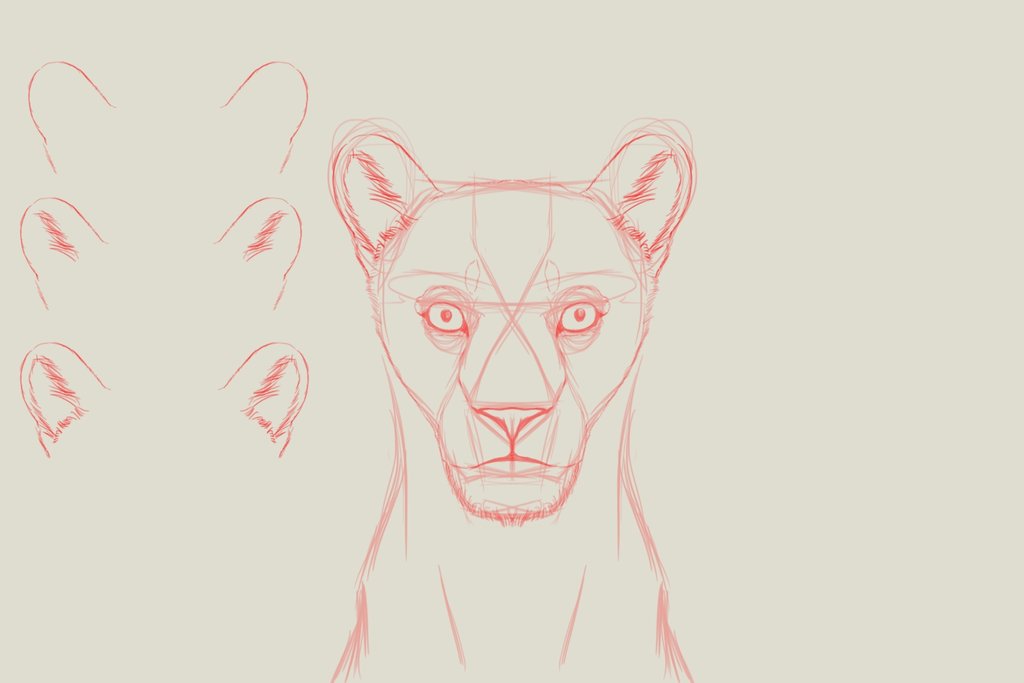
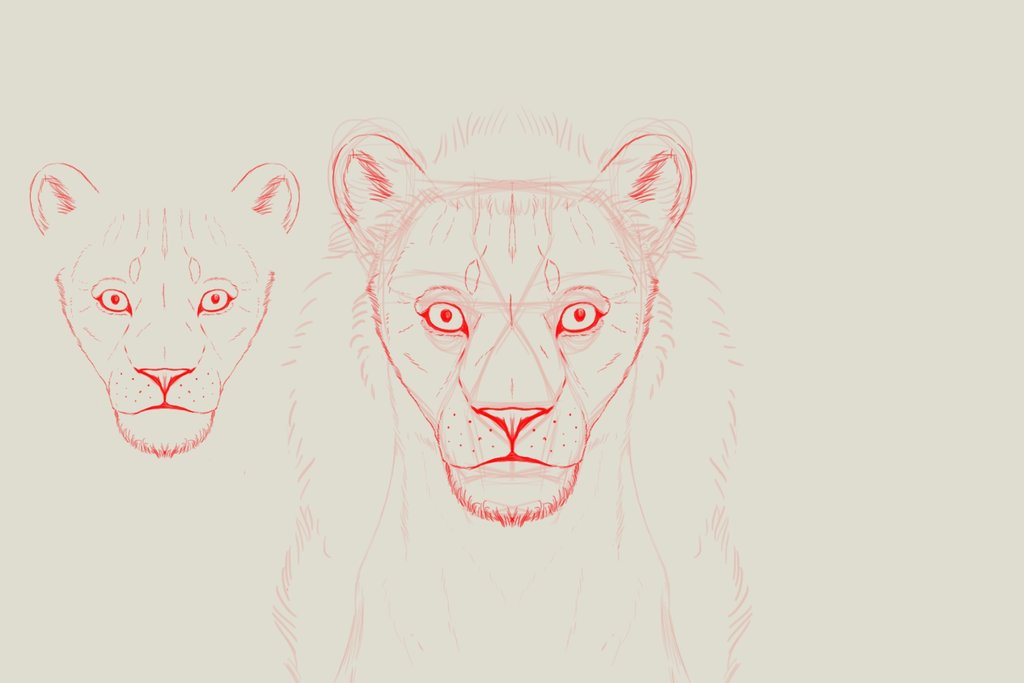
Skeletons in My Canvas
Here I threw down the basics in the form of a really rough "skeleton" sketch(as I refer to them as). I personally used a mirroring/symmetry tool to do most of the lion in this tutorial. I don't always use said tools, but they are very helpful to keep your proportions right.
I started with the triangle for the nose area, then moved up the center of the face with the other triangular lines. From there, I drew the line across for the eyes and brows. As you can see, it's slightly above where the second and third triangular(not complete or true triangles, if I'm being honest) lines meet. I added the circles for the eyes themselves too. After that came the shape of the muzzle, which is more or less a circle, and then the face, which is also mostly circular, with a flat-ish top. Then the ears, which are pretty much ovals. Lastly came the neck area. I first drew a line straight down(remember that this was using symmetry, so it's really two lines going down!), then out a bit at a diagonal, down, and out again.

KISS: Keep It Simple Stupid
This here just shows the very basic shapes if you're using the planes method(often used in drawing faces). You start with a circle, add the cross so it's divided pretty evenly into fours(or not if you're going for an angle), add a line for the nose just above the bottom of the circle, and one below that which has about the same distance between the middle line and the nose line. Last, add another circular shape for the muzzle.
This here just shows the very basic shapes if you're using the planes method(often used in drawing faces). You start with a circle, add the cross so it's divided pretty evenly into fours(or not if you're going for an angle), add a line for the nose just above the bottom of the circle, and one below that which has about the same distance between the middle line and the nose line. Last, add another circular shape for the muzzle.
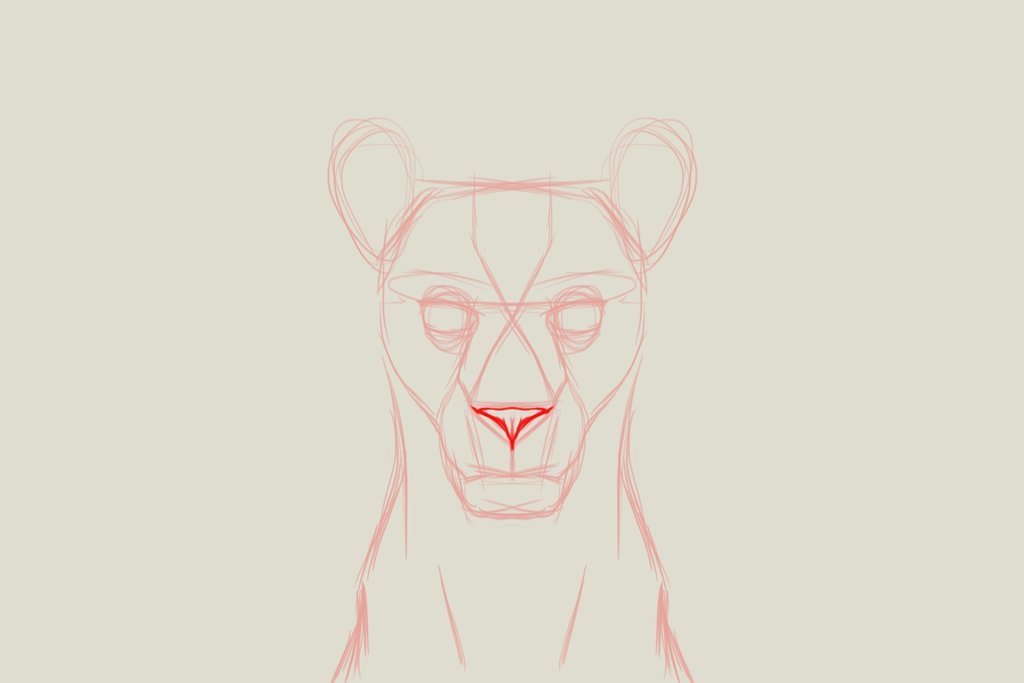
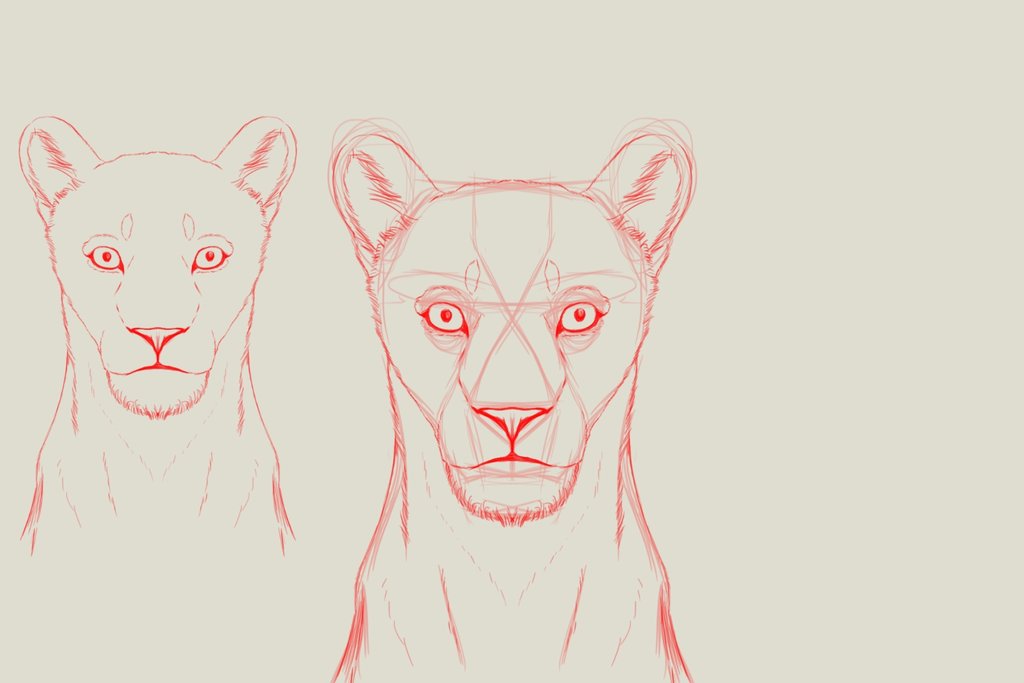
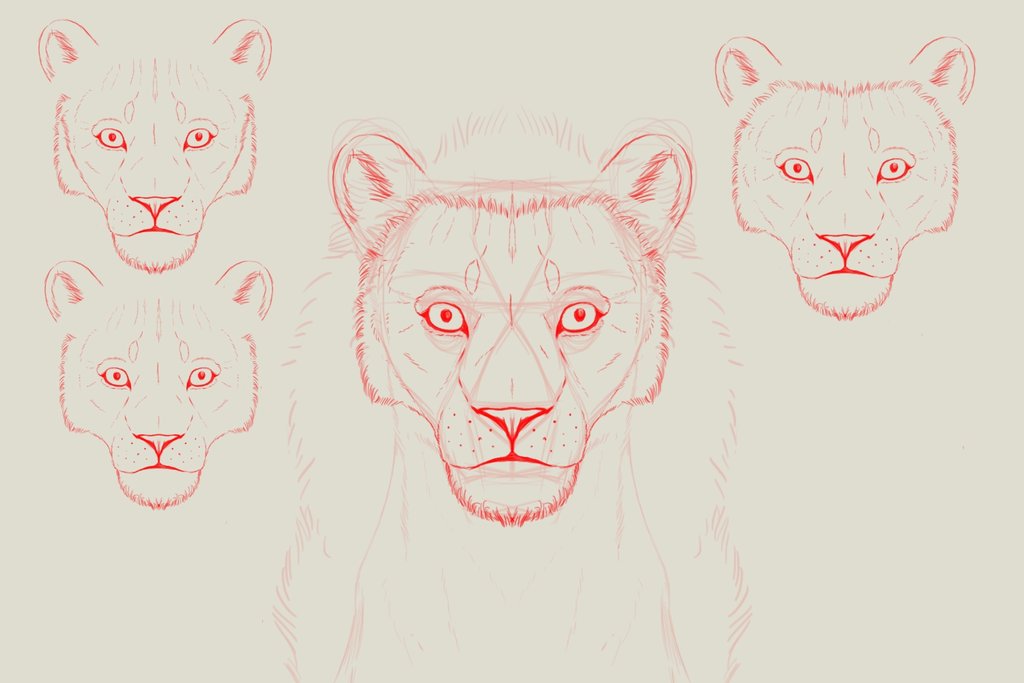
All the Better to Smell You With
Here I drew the nose. If you look at them, lion noses are actually pretty small, and the size and shape are really going to depend on how open the nostrils are. Here the nostrils are pretty "averagely"(I guess) open. They're all pretty much triangles, though the negative here kinda reminds of me of a bull skull XD Honestly, it's kinda hard to describe drawing a nose in more than one sentence beyond, "I drew the nose." Sorry about that.
Here I drew the nose. If you look at them, lion noses are actually pretty small, and the size and shape are really going to depend on how open the nostrils are. Here the nostrils are pretty "averagely"(I guess) open. They're all pretty much triangles, though the negative here kinda reminds of me of a bull skull XD Honestly, it's kinda hard to describe drawing a nose in more than one sentence beyond, "I drew the nose." Sorry about that.
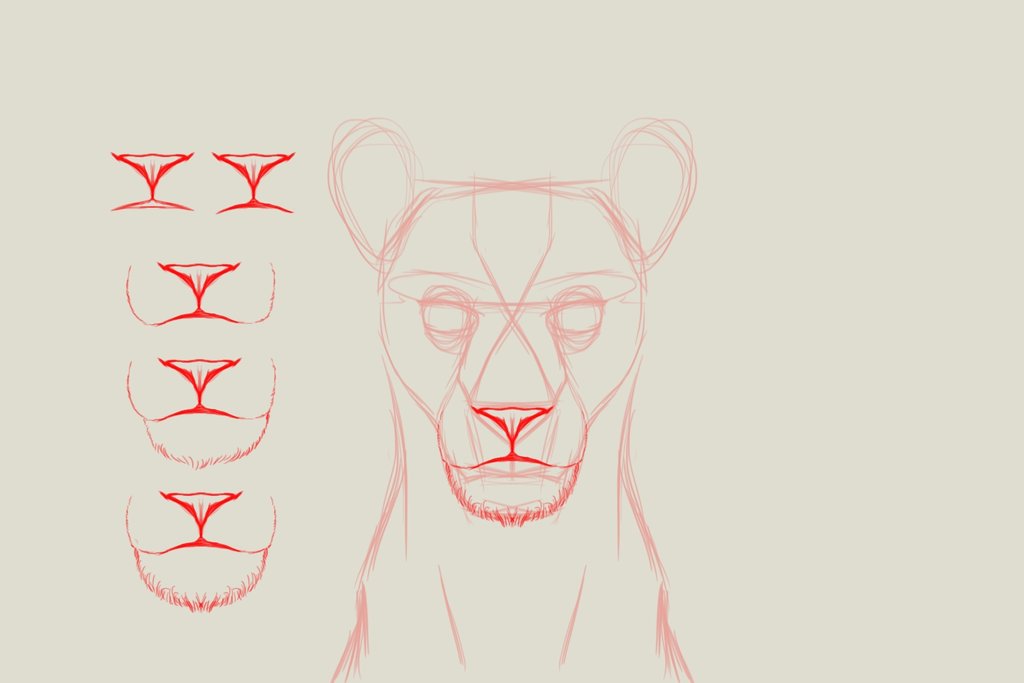
Honey I Love You, Won't You Please, Please Smile?
Now I moved on to the mouth. In my more cartoony style, the nose and mouth can pretty much be flipped upside down and look the same, but here with a more realistic style, the mouth is much more of a thin, wide line compared to the nose. After you draw the main part of the mouth(remember that lions have dark lips), you'll draw the more or less cheeks of the mouth. On the side there, I did it without symmetry, which can be nice, but if you're working in symmetry, I don't recommend trying to do it this way unless you finish everything else first. When you're done with that, draw the chin/bottom of the mouth.
Now I moved on to the mouth. In my more cartoony style, the nose and mouth can pretty much be flipped upside down and look the same, but here with a more realistic style, the mouth is much more of a thin, wide line compared to the nose. After you draw the main part of the mouth(remember that lions have dark lips), you'll draw the more or less cheeks of the mouth. On the side there, I did it without symmetry, which can be nice, but if you're working in symmetry, I don't recommend trying to do it this way unless you finish everything else first. When you're done with that, draw the chin/bottom of the mouth.
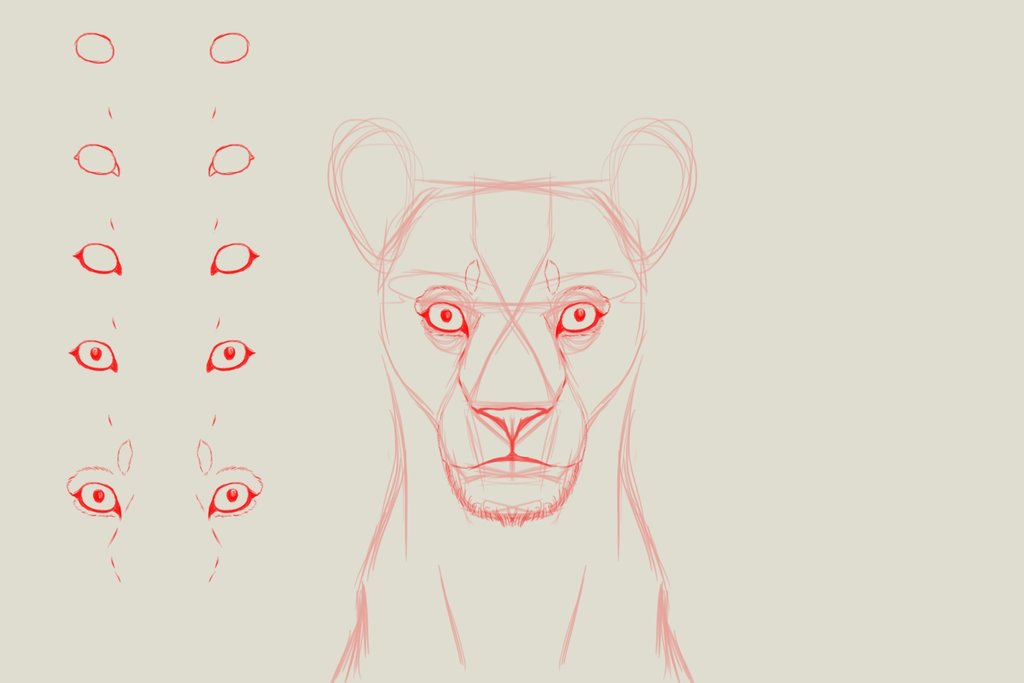
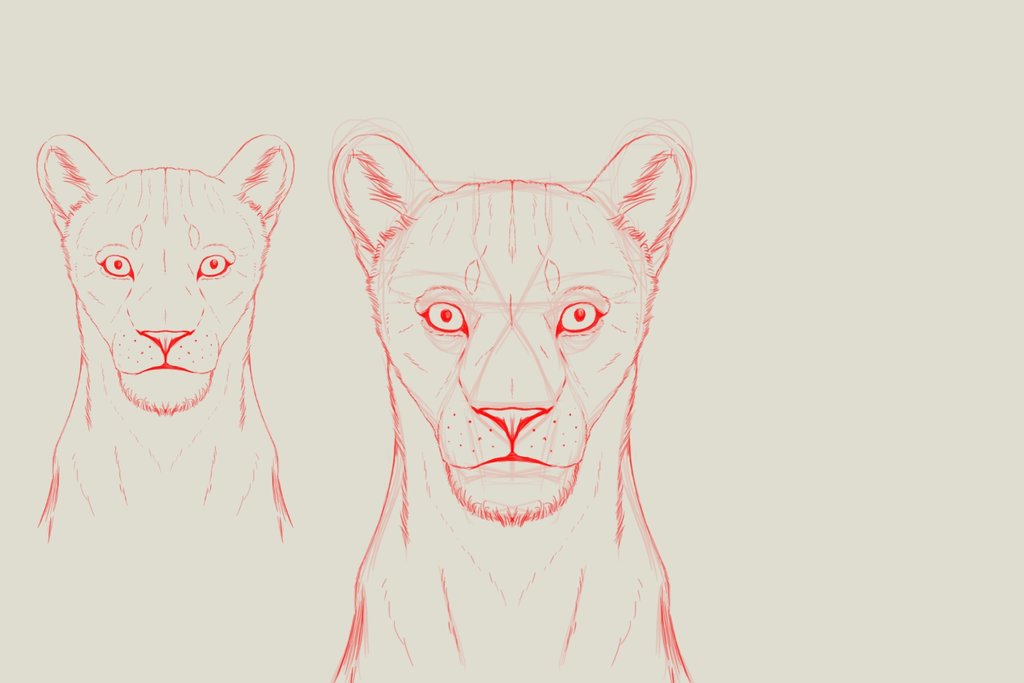
"Eye" See You...
The eyes on the lion are fairly circular, like much of the face honestly. Once you got the basic shape of it down, add the basic details, like the dark liner and thing that I have no idea what the anatomical name of it is... nor do I really care to know. Pupils are next, followed by the details around the eyes and from the nose up to the eyes.
The eyes on the lion are fairly circular, like much of the face honestly. Once you got the basic shape of it down, add the basic details, like the dark liner and thing that I have no idea what the anatomical name of it is... nor do I really care to know. Pupils are next, followed by the details around the eyes and from the nose up to the eyes.

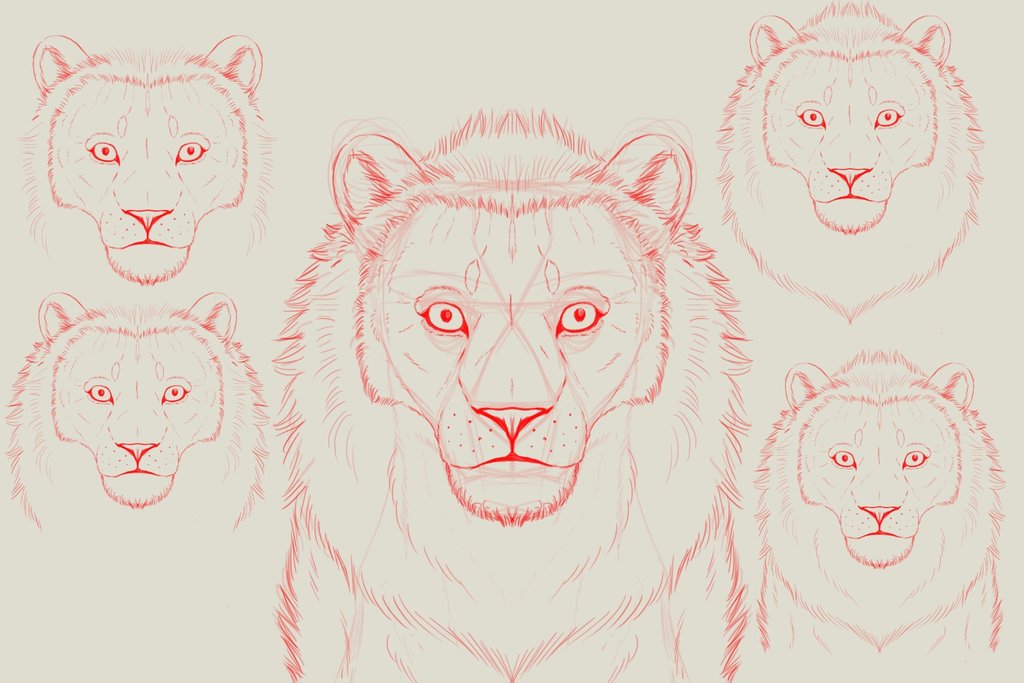
Face of an Angel... Er, Lion
Here I finished up the face's basic shape and lines. To note, some lions have a bit "fluffier" faces than others, while this one is pretty standard.
Here I finished up the face's basic shape and lines. To note, some lions have a bit "fluffier" faces than others, while this one is pretty standard.
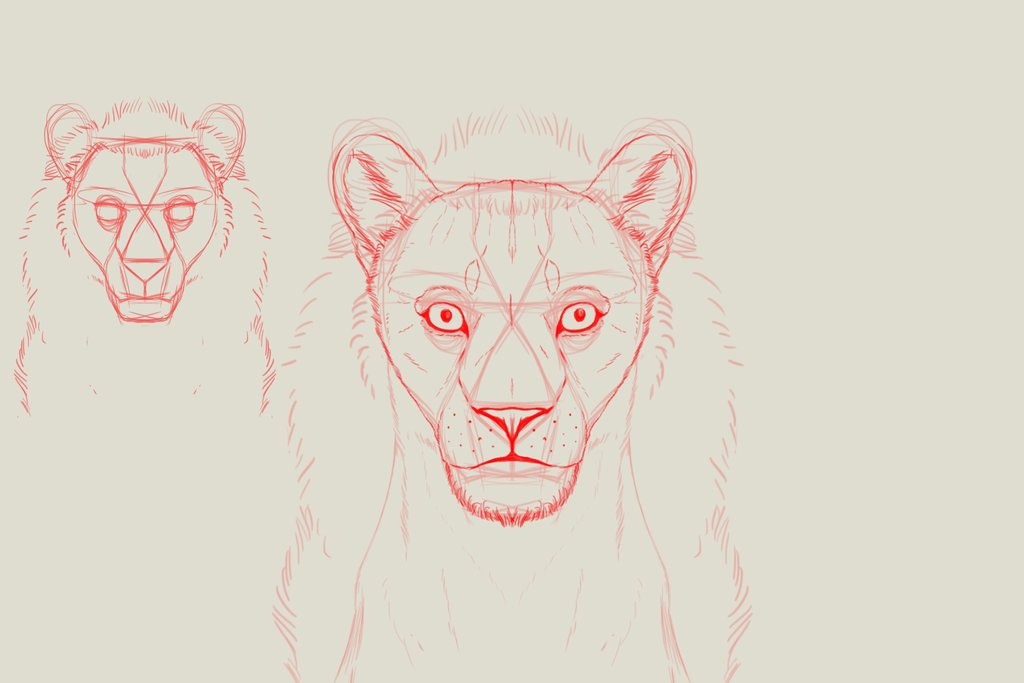
Can You Hear Me Now?
The ears on a lion are fairly round. A general rule of thumb with cats is the bigger the cat, the rounder the ears. When you really look at them, not even domestic cats have purrfectly(I should probably stop meow) pointy triangles for ears. Lions also have pretty furry ears. It helps keep stuff out.
The ears on a lion are fairly round. A general rule of thumb with cats is the bigger the cat, the rounder the ears. When you really look at them, not even domestic cats have purrfectly(I should probably stop meow) pointy triangles for ears. Lions also have pretty furry ears. It helps keep stuff out.
Nothing but Neck
The neck is fairly straight forward here, since we already had the basic shape down from the rough sketch.
The neck is fairly straight forward here, since we already had the basic shape down from the rough sketch.
It's the Little Things that Matter
At last, we can finish up those final details and lines. If you look at most lioness, they have some wrinkles at the top of their head often. I also added some dots for the whiskers(which as it happens, I never added in the end), polished up some of the little fur details, and so on!
And Now We're Done...
Or are we?
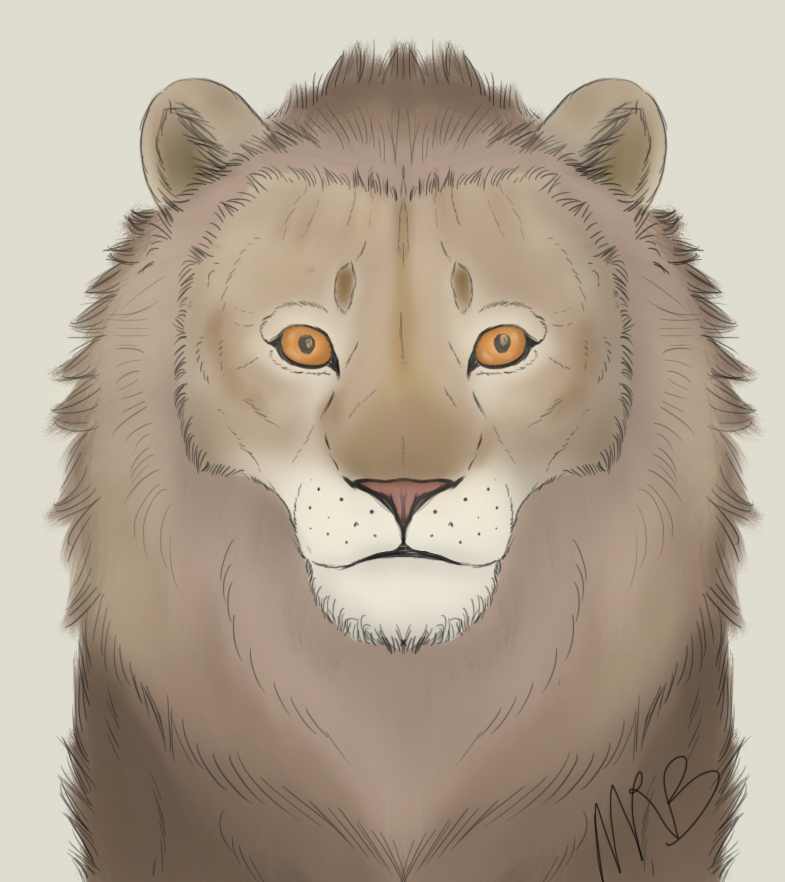
Did You Just Assume My (Art's) Gender... -_-
Making a lioness into a male lion is not too hard. In fact, I do it a lot because lionesses just look naked to me >.< So, to finish up this tutorial, I'll show you how to change that lioness you just drew into a guy!
The rough sketch will now have just the face and the rough version of the mane. We'll keep the lioness as a separate layer with the opacity down for now, just so we still have it for reference.
All That Work, Gone To Waste
For the next part, you'll be doing a good bit of erasing. You pretty much want to leave nothing but the face and ears. Erase the neck, the top of the head(just barely), and part of the lower ears(leave a good bit, as you can also erase more later if needed!). It's a smart move to have a backup of your lines saved before you do this too. Never know when something might crash or break down.
For the next part, you'll be doing a good bit of erasing. You pretty much want to leave nothing but the face and ears. Erase the neck, the top of the head(just barely), and part of the lower ears(leave a good bit, as you can also erase more later if needed!). It's a smart move to have a backup of your lines saved before you do this too. Never know when something might crash or break down.
It's So Fluffy!!!
Now we get to add all the fluff around Mr. Floof's face. You may want to make the lion's face a little more square like I did here, by adding more to his cheeks, or he might have a thinner face and you can leave it as is. You're also going to add the lines where his face meets his mane here.
Now we get to add all the fluff around Mr. Floof's face. You may want to make the lion's face a little more square like I did here, by adding more to his cheeks, or he might have a thinner face and you can leave it as is. You're also going to add the lines where his face meets his mane here.
Maybe He's Born With It, Maybe It's Manebelline
Finishing up the mane should pretty much be taken in a few steps. First add what is directly around the face; this should be shorter than the rest of the mane, though not always. Next add what is around most of the head. I sort of made this boy have a mane that has a big fluffy loop around his head. Once you have all the basics down for the mane, add some little details to show the flow of it.
Finishing up the mane should pretty much be taken in a few steps. First add what is directly around the face; this should be shorter than the rest of the mane, though not always. Next add what is around most of the head. I sort of made this boy have a mane that has a big fluffy loop around his head. Once you have all the basics down for the mane, add some little details to show the flow of it.
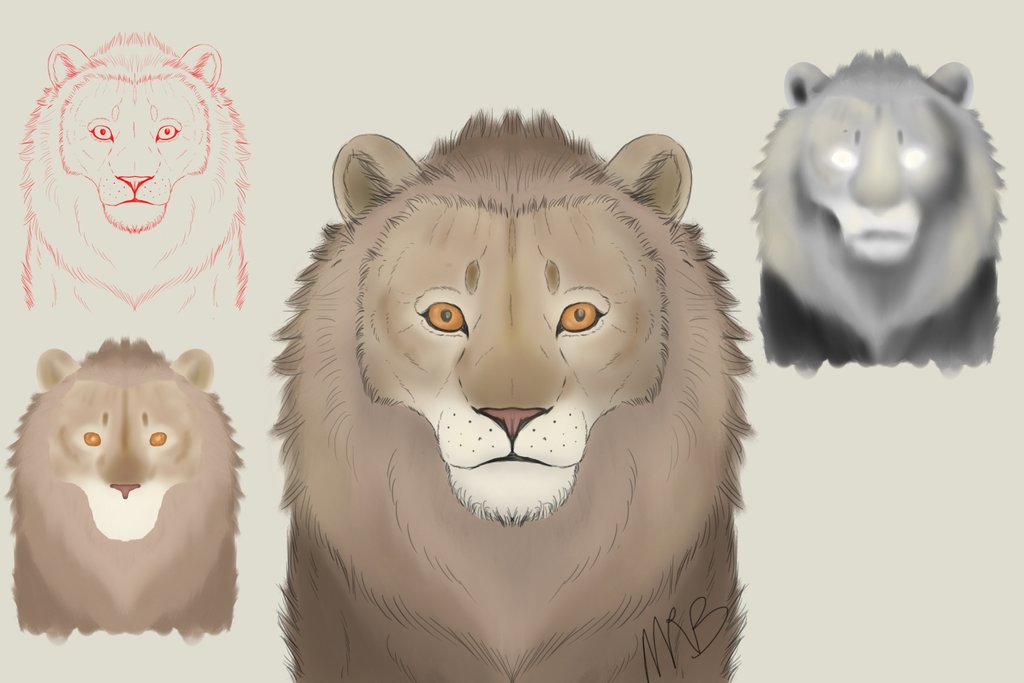
A Natural Beauty
Finally we add color and shading! Personally, I prefer a soft coloring style, and I went for a mostly natural colored lion here. As a tip, most lions have some lighter colored mane around the immediate area of the face, and then some have much darker further down, but really the color and shades of the mane can vary quite a bit. Mostly just remember that the lion's mane is not likely to be just one shade or color. (Sorry TLK boys.)
For shading, I've recently come to like the method I used here. Combine a copy of all your color layers(or just make a copy if you only used one). Next grayscale this combined color layer, place it above your line layer, and then set the layer to "Multiply". This will also effect your colors, making some darker than other, so you may want to make any area you don't want darkened white on the grayscale layer. Play around with black, white, and grays till you get the shading right. Add another layer now for some highlights. Work with whatever light color you prefer for your piece, in this case a soft yellow. When you're done with the shading and highlight layers, play around with their layer opacity to get everything just right. The shading layer in the final piece here was around 35% and the lighting was around 60%.
Hope you enjoyed this tutorial!
If you'd be interested in more of these from me in the future, please comment and let me know! I hope this is a help to someone out there. Have fun making a pride of lions ^^
 RSS Feed
